How to Use PixelLab: 13 Proven Ways to Master for Beginners and Pros
PixelLab has become one of the go-to apps for anyone serious about mobile design and photo editing. From adding stylish text to crafting professional-looking graphics, it offers an impressive range of tools — all from your smartphone. But despite its simple interface, mastering PixelLab takes more than just tapping a few buttons.
PixelLab has many features, so it may feel confusing at first, especially for beginners. But don’t worry whether you are using PixelLab on PC or iOS, this guide will help you get started easily.
1. What is PixelLab and What is It Used For?
PixelLab is a android mobile app for creating stunning graphics, logos, thumbnails, flyers, and social media posts. You can use it for text designs, photo editing, 3D logos, and professional compositions. It is perfect for Instagram posts, YouTube banners, and business cards.
2. Getting Started with PixelLab
How to Use PixelLab APK on Android
- Download PixelLab APK from Google Play or trusted sites like pixellabnow.
- Enable “Unknown Sources” in Android settings for APK installation.
- Install and open the app.
How to Install PixelLab on Laptop or Run PixelLab on PC
- Download an Android emulator like BlueStacks.
- Install PixelLab via Google Play in the emulator.
- Use mouse and keyboard for precise editing.
How to Use PixelLab App
- Accept terms and select language on first launch.
- Explore the toolbar and editing tools.
- Create your first design on the empty canvas.
- System Requirements: Needs Android 5.0+ and 50MB free space.
3. Understanding the PixelLab Interface
The PixelLab interface is simple and intuitive, designed for creating stunning graphics like logos, thumbnails, and social media posts. It organizes tools and features for easy access, letting you focus on designing. Below, each part of the interface is explained with practical tips to maximize its use.
Toolbar: The toolbar is at the top of the screen and acts as your control center.
- Tap the “New” button to start a fresh project, choosing canvas sizes like 1280x720px for YouTube thumbnails or 2100x2970px for A4 flyers.
- The “Save” button stores your work as a .plp file for future edits, keeping layers intact.
- Use the “Export” option to save designs as PNG for transparent backgrounds or JPG for smaller files.
- The “Share” button lets you send designs directly to Instagram or other platforms, making it easy to post graphics.
The toolbar also includes undo and redo arrows to fix mistakes quickly, saving time during editing.
Editing Tools Panel: it is located at the bottom, offers everything you need to create.
- Tap the “Text” tool to add customizable text, adjusting fonts, colors, or effects like shadow and emboss for professional text designs.
- The “Shapes” tool lets you insert circles, rectangles, or lines to enhance your graphics.
- Use the “Stickers” option to add pre-made or custom stickers, perfect for social media posts.
- The “Image” tool imports photos from your gallery or built-in backgrounds, while the “Effects” tool applies filters, gradients, or blending modes to polish your designs.

Workspace: The workspace is the central canvas where your design comes to life. It shows real-time previews as you add text, images, or shapes, letting you see changes instantly. Drag elements to reposition them or pinch to zoom for detailed edits, like refining a logo’s edges. The canvas supports multiple elements, so you can layer text, stickers, and photos for complex designs. Set canvas sizes for specific projects, like 1080x1080px for Instagram posts, ensuring your graphics fit perfectly.
Layers Panel: The layers panel organizes your design elements for easy management. Each text, image, or shape is a separate layer, letting you reorder, hide, or lock them. For example, move a logo layer above a background image for better visibility. Tap a layer to edit it without affecting others, which is great for intricate projects like flyers. Use the merge option carefully, as PixelLab doesn’t support unmerging layers; duplicate layers first to avoid losing work. This panel keeps your projects organized and efficient.
Pro Tip: For better control, pinch your fingers to zoom in on the canvas, making it easier to adjust small details like text alignment or sticker placement. Enable the grid in settings to align elements precisely, ensuring clean designs for professional outputs like business cards. Snap-to-grid helps lock elements in place, reducing errors in social media graphics or 3D logos. These tips make editing smooth and accurate, even for beginners.
4. Core Features for Design
How to Design with PixelLab?
Below are the steps to use PixelLab to design your arts:
To start designing with PixelLab, open the app and tap the “New” button in the toolbar to create a new project. Choose a canvas size based on your goal, like 1280x720px for a YouTube thumbnail, 1080x1080px for Instagram posts, or 2100x2970px for an A4 flyer. A blank canvas appears in the workspace, ready for you to add elements. This step sets the foundation for your graphic design project, ensuring the right dimensions for your output.
Next, add text to bring your design to life. Tap the “Text” tool in the editing tools panel to insert text, then type your message, such as a catchy title for a thumbnail, then customize it by selecting from hundreds of fonts, including custom ones you’ve added. Change the font size, adjust alignment, or pick a color from the color picker.
Customize your design with colors, effects, and layers for a polished look. Adjust text or shape colors using the color picker in the editing tools panel. Apply effects like shadow, emboss, or reflection to make elements stand out. Use the layers panel to organize elements, such as placing text above an image. Layers let you edit one element without affecting others, making it easy to tweak designs like social media posts or 3D logos.
For shapes and stickers, tap the “Shapes” tool to insert circles, rectangles, lines, or arrows, which add structure to your designs. Use the “Stickers” tool to add pre-made or custom stickers, like icons or emojis, to make social media graphics pop. Resize or rotate shapes and stickers by dragging their edges, ensuring they fit your composition, such as a logo with a circular frame.
To import images, tap the “Image” tool in the editing tools panel. Upload photos from your device’s gallery for personalized designs, like adding a product image to a flyer. Alternatively, select built-in backgrounds, such as gradients or textures, to set the mood for your project. Adjust image brightness or contrast to blend with other elements, creating cohesive graphics for Instagram or YouTube.
Apply colors and gradients to enhance your design. Use the color picker to apply solid colors to text, shapes, or backgrounds for a bold look. Select the gradient option to blend two or more colors, adding depth to elements like text or a logo’s background. Gradients are great for modern designs, such as vibrant social media posts or sleek business cards.
To add a border in PixelLab, select a shape or text layer in the workspace. Tap the stroke option in the editing tools panel, adjust the stroke width for thickness, and choose a border color from the color picker. Borders highlight elements, like outlining text on a thumbnail or framing a logo, making your design stand out.
5. Mastering Background Editing
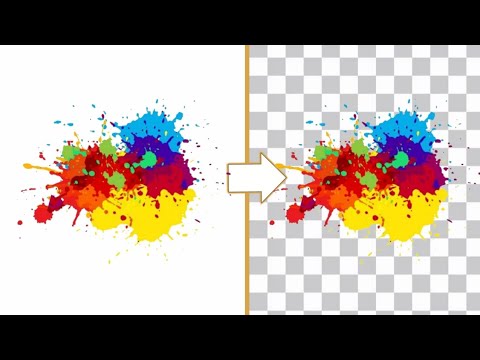
How to Remove / Erase Background in PixelLab?
Import Image: Open PixelLab, tap the + icon, and select your image from the gallery.
Erase Background: Select the image, go to the Eraser tool, and use the Color Picker to target the background color (e.g., white) and remove it.
Adjust Tolerance: Use the Tolerance slider to fine-tune the erasure, keeping key image details intact.
Refine Edges: Smooth rough edges with the Smooth Edges tool or Manual Eraser for a clean, transparent look.
For more clarity you can watch the video given below:
How to Change Background in PixelLab:
To swap out a background in PixelLab, first remove the original background using the Erase Color tool for solid colors or the Manual Eraser for precise cleanup. Then, import a new image or gradient as the background layer by tapping the + icon and selecting From Gallery or creating a gradient with PixelLab’s tools.
How to Blur image in PixelLab?
Here’s a simple guide to achieve a polished blur effect:
- Duplicate Layer: Select the background or subject layer, tap the menu, and choose Duplicate.
- Apply Blur to Layer: On the duplicated layer, go to Effects, select Blur, and adjust the Blur Intensity slider.
- Blur Text (Optional): Add text with the Text tool, set opacity to 0, then go to Shadow settings and increase Blur Radius for a blurred text effect.
- Adjust for Effect: Fine-tune the blur strength to achieve a professional, seamless look.
This technique adds depth and focus to your designs.
6. Working with Fonts
How to Download Fonts for PixelLab?
To download fonts to pixelLab and to get best results, download fonts from reputable sources to avoid corrupted files. Test fonts in PixelLab to ensure they display correctly, especially for non-Latin scripts like Urdu or Marathi.
Fix Font Issues: If a font fails to load, verify it’s a valid .ttf or .otf file and restart the app. This process lets you create professional text designs for social media posts, logos, or flyers with ease.

7. Advanced Design Techniques
PixelLab’s advanced tools let you create professional graphics like 3D logos, custom shapes, and mockups for social media posts, flyers, or branding. These features help you design with precision and creativity. Below, learn how to use the Bezier tool, make 3D logos, create logos, use mockups, and flip images in PixelLab with clear steps to elevate your graphic design projects.
How to Use Bezier Tool in PixelLab?
To use the Bezier tool in PixelLab, tap the “Shapes” tool in the editing tools panel and select the Bezier option. Click on the canvas to set a start point, then click again to set an end point, creating a straight line. Drag the control handles that appear to shape smooth, flowing curves, perfect for custom logos or intricate designs. Adjust the handles to fine-tune the curve’s arc, making it sharp or gentle as needed.
To create complex shapes, add more points by clicking along the path and dragging handles for each segment. Save your shape and edit it later by selecting the Bezier layer in the layers panel, allowing you to tweak curves for designs like stylized text outlines or unique icons for social media graphics. This tool gives you control to craft precise, professional shapes.
How to Use PixelLab app to make 3D Logo?
Creating a 3D logo in PixelLab is simple and gives your design a bold, professional edge. Begin by adding text or a shape to your canvas using the “Text” or “Shapes” tool—try a brand name or a circle as the base. Use the “3D Transform” tool to tilt the element along the X, Y, or Z axis for a dynamic 3D effect. Add depth with a shadow by selecting the “Effects” tool, choosing “Shadow,” and adjusting the offset and blur. Combine text and shapes for a striking look, then export as a PNG to keep a transparent background, perfect for branding or social media. For a detailed walkthrough, explore our guide on Creating 3D Logo Creation in PixelLab.
How to Create Logo in PixelLab?
Designing a logo in PixelLab is straightforward and fun. Start by opening a new project and selecting a transparent canvas for versatility. Use the “Shapes” tool to add elements like circles or lines, and customize them with the Bezier tool for unique outlines. Add text using the “Text” tool, picking a bold or stylish font from “My Fonts” for the brand name. Enhance your design with 3D effects, shadows, or embossing via the “3D Transform” tool. Organize layers to keep text above shapes for a clean look. Export as a PNG to maintain the transparent background, perfect for business cards, websites, or flyers. For a step-by-step guide, check out our full article on Mastering Geometrical Logo Creation in PixelLab.
How to Use Mockup in PixelLab?
To use a mockup in PixelLab, import a mockup image, like a phone screen or billboard, by tapping the “Image” tool and selecting a file from your gallery. Place your design, such as a logo or poster, on a new layer using the “Text” or “Image” tool.
Adjust the design’s size and position to fit the mockup’s screen or surface. Use the “3D Transform” tool to tweak the perspective, aligning your design with the mockup’s angle for a realistic look.
For instance, add a logo to a phone screen mockup for a branding presentation. Blend the layers using the “Effects” tool with options like overlay to match lighting. This technique creates professional mockups for showcasing social media graphics or app designs.
How to Create a Mockup in PixelLab?
1. Import Background
- Open PixelLab.
- Tap “+” → From Gallery.
- Select a mockup background (e.g., t-shirt, card, screen).
2. Add Your Design
- Tap “+” → From Gallery.
- Import your logo or design.
- Resize and position it over the mockup.
3. Adjust Perspective
- Select the design layer.
- Tap Edit → Perspective.
- Match the angle of the surface (like a tilted screen or card).
4. Blend and Style
- Use Shadow, Opacity, and Blend Modes (like Multiply or Overlay) to make it look realistic.
5. Save Your Mockup
- Tap Save → Save as Image.
- Choose high resolution and export.

How to Flip Image in PixelLab?
To flip an image in PixelLab, select the image layer in the workspace after importing a photo with the “Image” tool. Tap the “Rotate” tool in the editing tools panel, then choose the horizontal or vertical flip option to mirror the image.
For example, flip a logo horizontally to face a different direction for a flyer layout. Adjust the image’s position or size after flipping to fit your design. This feature is useful for creating balanced compositions, like symmetrical Instagram posts or mirrored elements in a thumbnail.
8. Creating Specific Designs
How to Make Thumbnail in PixelLab?
To create a thumbnail, set the canvas size to 1280×720 pixels. Use bold text and incorporate vibrant images. Apply effects such as shadows to enhance the design. Once complete, export the file as a PNG to finalize your thumbnail.
How to Make YouTube Banner in PixelLab?
To create a YouTube banner in PixelLab, begin by setting the canvas size to 2560×1440 pixels. Design your banner using text and images, ensuring all key elements are placed within the safe area for optimal visibility. Once your design is complete, export the file as either a JPG or PNG.
How to Design Flyer with PixelLab?
For designing a flyer in PixelLab, begin by configuring the canvas to A4 size (2100×2970 pixels at 300 DPI). Include text, images, and stickers to craft a visually appealing design. When finished, export the file as a JPG for printing.
What is the Size of A4 Paper in PixelLab: For A4 Size in PixelLab, use 2100x2970px (300 DPI) or 2480x3508px for higher quality.
9. Editing and File Management
How to Edit Picture on PixelLab?
Creating a stunning visual for your project is easy with PixelLab. Start by importing an image into the app. Next, fine-tune the brightness, contrast, or apply filters to achieve the desired look. Enhance the design further by adding text or effects to make it stand out. For a detailed guide on designing and editing with PixelLab you can visit the detailed post.
How to Redo in PixelLab?
PixelLab makes designing easier with simple keyboard shortcuts for a smoother workflow. Here’s how you can speed things up:
- Ctrl + Z: Undo your last action instantly.
- Ctrl + Y: Redo any action you’ve undone.
- Ctrl + C and Ctrl + V: Quickly copy and paste elements in your design.
For Android users, PixelLab keeps it even simpler. Just tap the Undo or Redo icons in the top toolbar to reverse or restore actions with ease.
How to Make PNG in PixelLab?
Creating a PNG in PixelLab is super easy and perfect for saving high-quality designs. Here’s a simple guide to get it done:
- Launch the PixelLab app on your device.
- Start a new project or tweak an existing design to your liking.
- When you’re happy with your work, tap the Save button in the top-right corner.
- Select Save as Image from the options.
- Pick PNG as your file type for crisp, transparent results.
Save the file to your device, and you’re all set!
How to Use PixelLab PDF?
PixelLab doesn’t directly support PDFs, but you can easily incorporate them into your projects with a quick workaround. Here’s a clear, concise guide to using PDFs in PixelLab for great results:
- Convert PDF to Image: Use a tool like Adobe Acrobat, an online converter, or a PDF-to-image app to turn your PDF into a PNG or JPG. Choose specific pages or convert the entire document, depending on your needs.
- Import into PixelLab: Save the converted image to your device. In PixelLab, tap the + icon, select From Gallery, and pick your image.
- Customize Your Design: Adjust the image’s size, position, or orientation. Enhance it with text, graphics, or effects using PixelLab’s tools to create a polished design.
By converting PDFs to images, you can seamlessly edit and customize them in PixelLab.
How to Open PSD File in PixelLab?
PixelLab doesn’t support PSD files directly, but you can easily use PSD content in your projects with a simple workaround. Here’s a quick guide to make it happen:
- Convert PSD to Image: Open your PSD file in Adobe Photoshop or a free online tool like Photopea. Export the layers or full design as a PNG (for transparency) or JPG.
- Import into PixelLab: Save the images to your device, then open PixelLab. Tap the + icon, choose From Gallery, and select your images.
- Edit and Enhance: Adjust the size, position, or style of the images. Add text, effects, or other elements using PixelLab’s tools to complete your design.
This method lets you seamlessly bring PSD content into PixelLab for creative projects.
How to Unmerge in PixelLab or Unmerge Layers in PixelLab?
PixelLab can’t unmerge layers once they’re combined. To avoid losing your original layers, duplicate them before merging. In PixelLab, select a layer, tap the menu, and choose duplicate. This keeps a backup for later edits. For more tips, see our guide on How to Design a Flyer with PixelLab.
For more details and understanding you can watch this video:

10. Saving, Exporting, and Sharing
- Save Projects: Save as .plp files for future edits.
- Export Options: Use PNG for transparency or JPG for smaller files.
- Share Designs: Share directly to Instagram or other platforms.
11. Tips and Tricks
- Undo/Redo: Use toolbar arrows for quick fixes.
- Alignment: Long-press and drag; enable snap-to-grid.
- Custom Stickers: Import PNGs for reusable stickers.
- Quality Settings: Use 300+ DPI for prints.
12. Troubleshooting
- App Crashes: Update app, clear cache, or reinstall.
- Export Fails: Check storage permissions and space.
- Slow Performance: Close background apps or reduce canvas size.
13. PixelLab for Social Media
- Instagram Posts: Use 1080x1080px; add bold text and stickers.
- YouTube Banners: Design at 2560x1440px for safe area compatibility.
- Tips: Use vibrant colors for engagement
Final Thoughts
PixelLab is a great free app for creating cool designs and editing photos. It’s easy to use, even if you’re just starting out. You can add text, use 3D effects, and make your pictures look better with just a few taps. Whether you’re making a YouTube thumbnail, a social media post, or a simple graphic, PixelLab has the tools you need. And if you ever get stuck or want new ideas, there are lots of helpful tutorials on YouTube. Once you learn the basics, you’ll be surprised at how much you can do with it!
FAQs
Which Country Made PixelLab?
Developed by App Holdings, USA.
Can PixelLab Open PSD Files?
No, convert to PNG or JPG first.
What’s PixelLab’s Full Potential?
Create logos, thumbnails, flyers, and social media graphics with ease.