How to Create a 3D Logo in PixelLab
Ever found yourself staring at a blank screen, full of ideas but unsure how to bring them to life? Designing a 3D logo can feel overwhelming , especially if you’re not a professional. But what if you could create an amazing 3D logo in PixelLab right from your phone or on PC? That’s where PixelLab application comes in. It’s a powerful yet simple app that provides you with the tools to design with ease. Whether you’re building a brand, starting a YouTube channel, or just refreshing your social media look, PixelLab makes the entire process fun and approachable. Ready to turn your ideas into a standout logo? Let’s get started and bring your vision to life!
How to Create a 3D Logo in PixelLab – Step by step Guide
Here we have a precise guide on designing a 3D logo in pixellab:
1. Start with a Transparent Background
Open PixelLab, tap “New,” and enable the transparent background. This makes your logo easy to use anywhere later.
2. Add and Customize Shapes
Tap “Shapes” to insert circles, lines, or rectangles. Use the Bezier tool if you want to create custom shapes or curves.
3. Insert Your Text
Tap “Text,” type your brand name, and select a bold or stylish font from “My Fonts” to match your brand vibe.
4. Add 3D Effects
Go to “3D Text” or “3D Rotate” to give your logo a 3D appearance . You can also add shadows, embossing, or an inner glow for more depth.
5. Organize Layers
Use the layer manager to rearrange elements-place text on top of shapes for a cleaner layout.
6. Save as PNG
Once you complete your design and satisfied with it , tap “Save as Image,” and select PNG format to retain the transparent background.
And that’s it! You’ve created a professional-looking 3D logo right from your phone using PixelLab.
For a detailed guide, we have a complete step-by-step guide too:
Step 1: Open the application select the “text”.
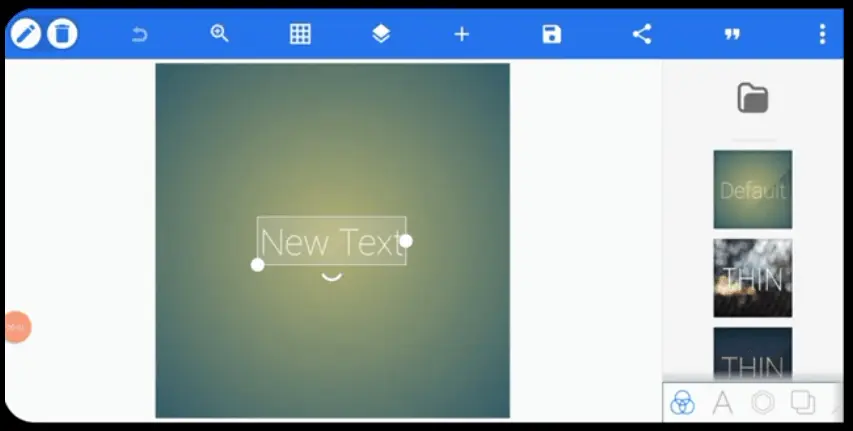
Step 2: Now replace the default text and write the desired logo text.
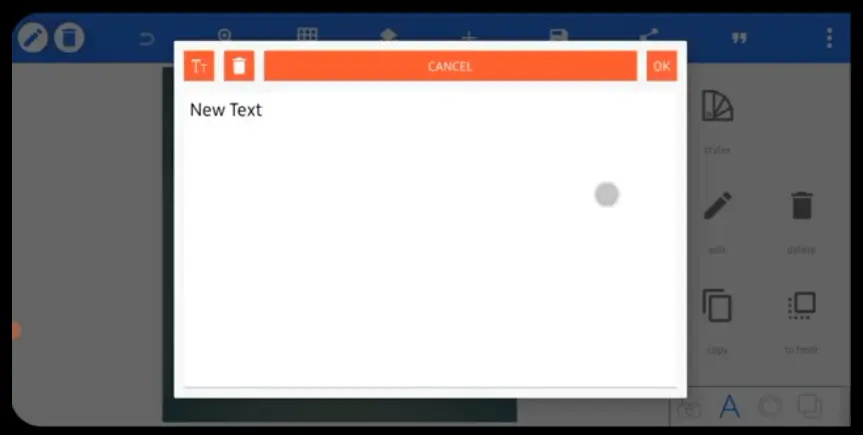
Step 3: In this case, we write the letter “S.”
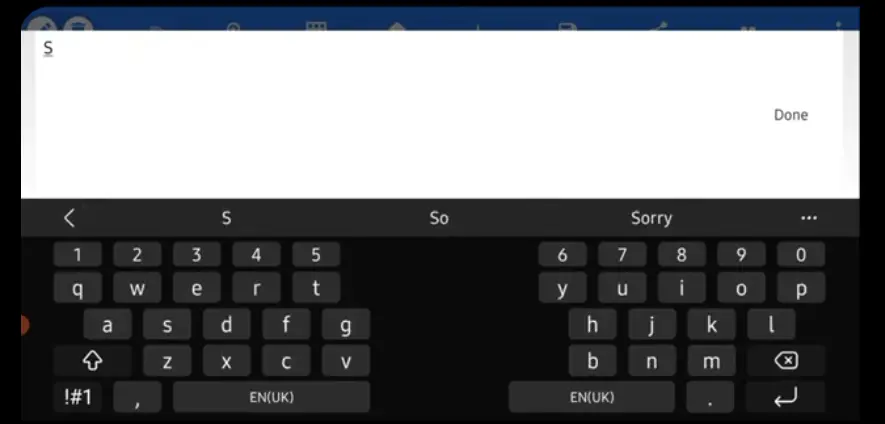
Step 4: For better visibility, change the font of the letter “S.” We chose the font called “Mont-HeavyDEMO.”

Step 5: Change the color of the text to black or any desired color.
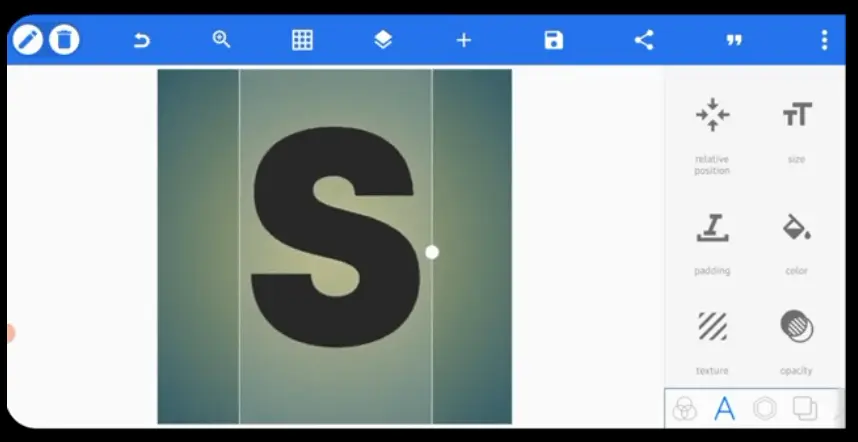
Step 6: Now, with the help of the “shapes” tool, change the background color to white. Adjust the layers.
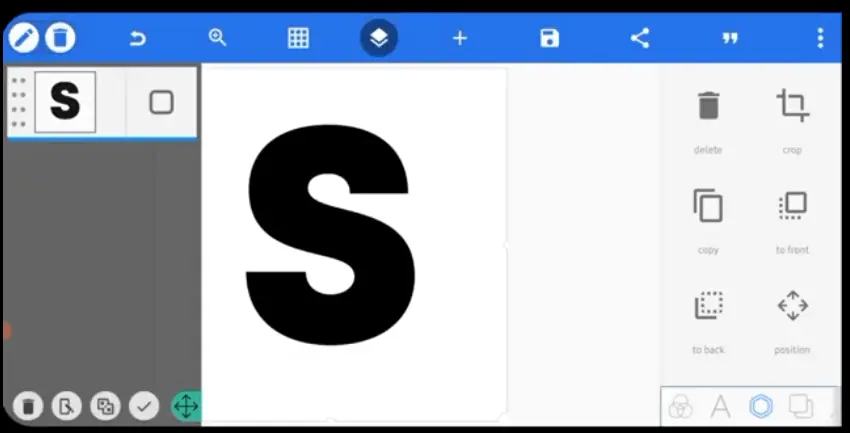
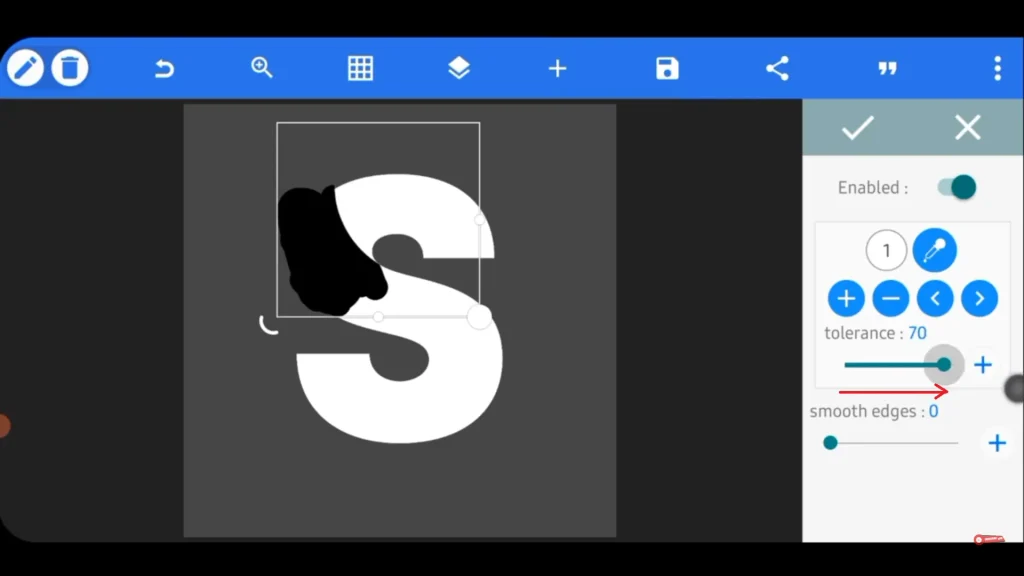
Step 7: In this step, remove the color black with the help of the “eraser” tool. Set the tolerance to 70.
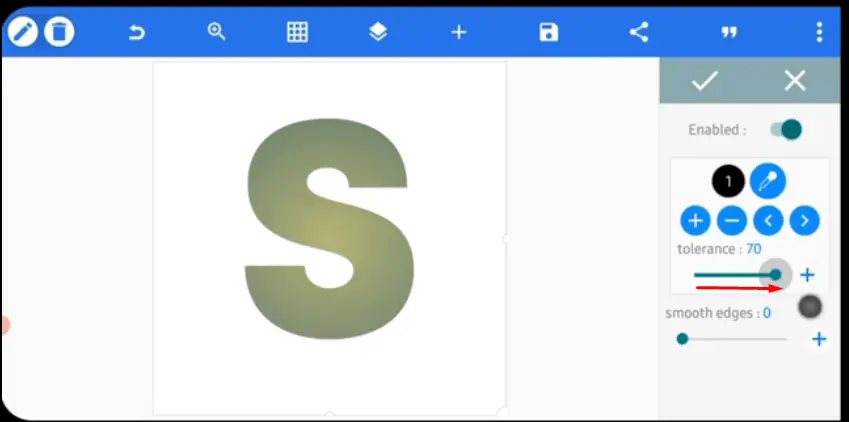
Step 8: Here select the Circle shape from “shapes” tool. Set this opacity to 49%.
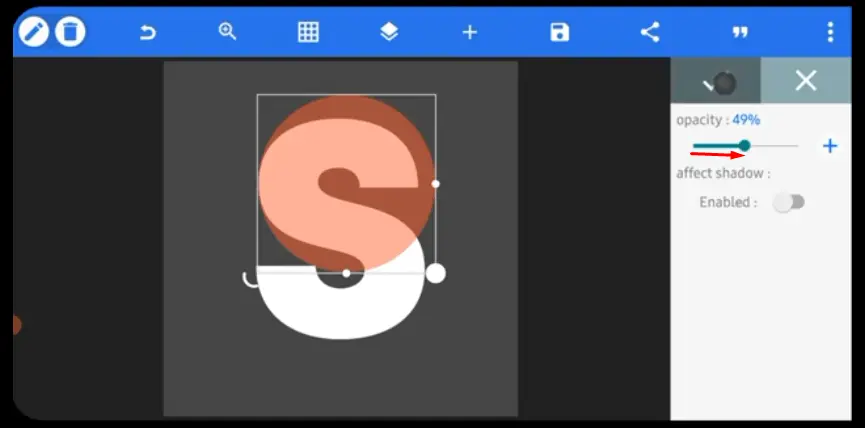
Step 9: Now select the draw tool, choose the color black , and draw roughly on the side of the letter “S,” as shown in the image.

Step 10: Change the color of the circle to “white” and set the opacity of the shape to 100%.
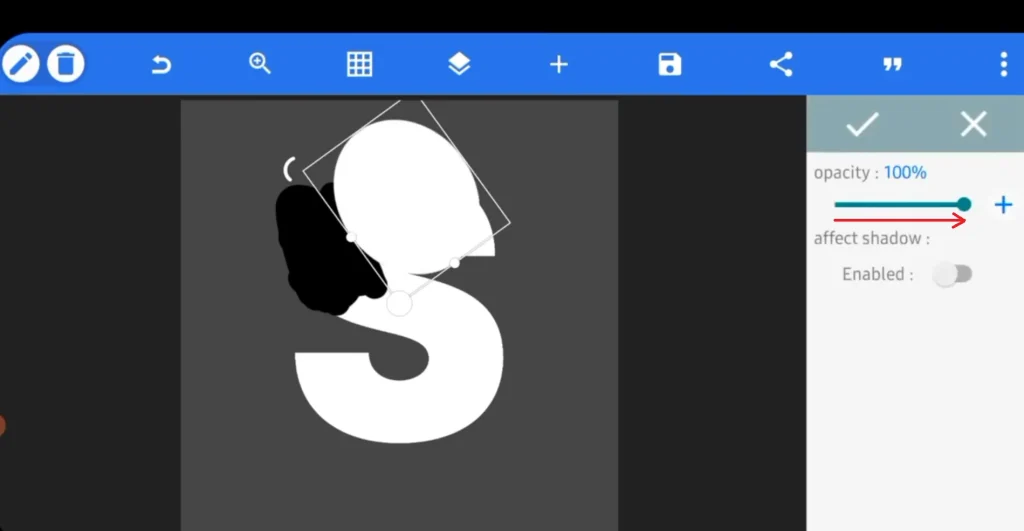
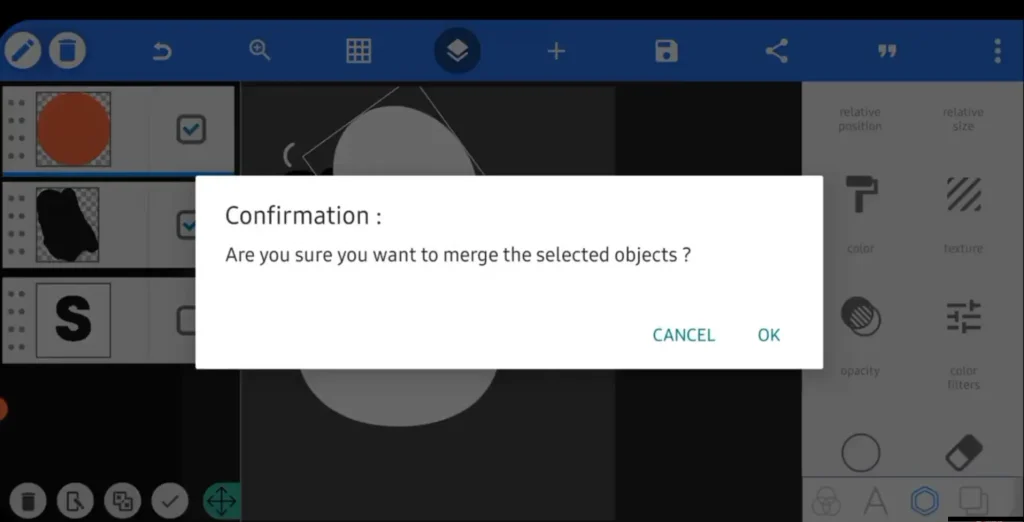
Step 11: Merge the first two layers.
Step 12: Set the tolerance to 70 and remove the background with eraser tool.
Step 13: Create the same abstarct design for the other curve of the letter “S”.
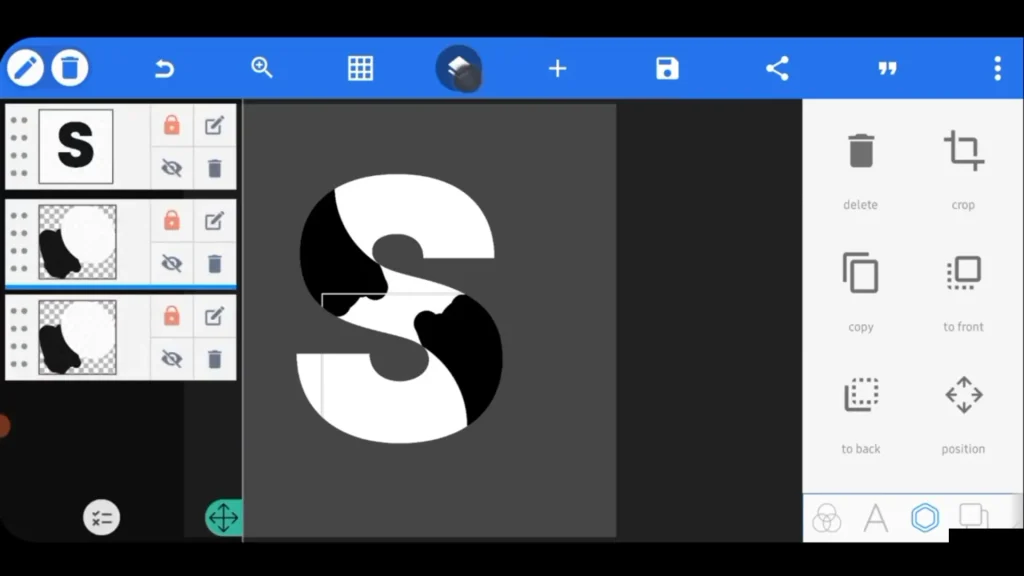
Step 14: Duplicate the abstract shape layers to maintain symmetry and consistency on both curves of the letter “S.”
Step 15: Carefully reposition and resize the abstract elements so they align naturally with the flow of the letter.
Step 16: Use the eraser tool with a tolerance of 60–70 to clean rough edges and refine the abstract shapes.
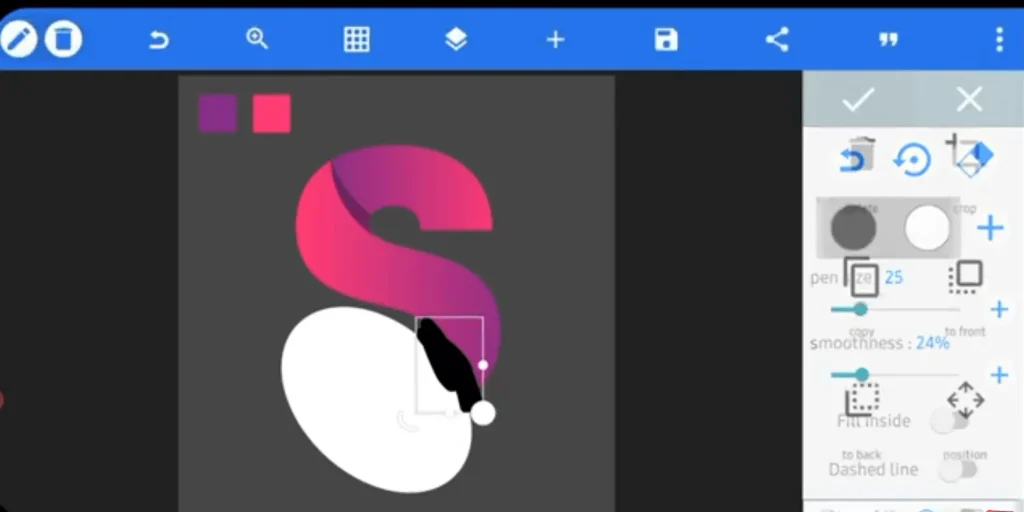
Step 17: Merge the abstract design layers with the main letter “S” layer once you are satisfied with the placement.
Step 18: Slightly adjust brightness and contrast (if available) to ensure the logo looks balanced and sharp.
Step 19: Zoom in and manually clean any remaining unwanted pixels for a polished finish.
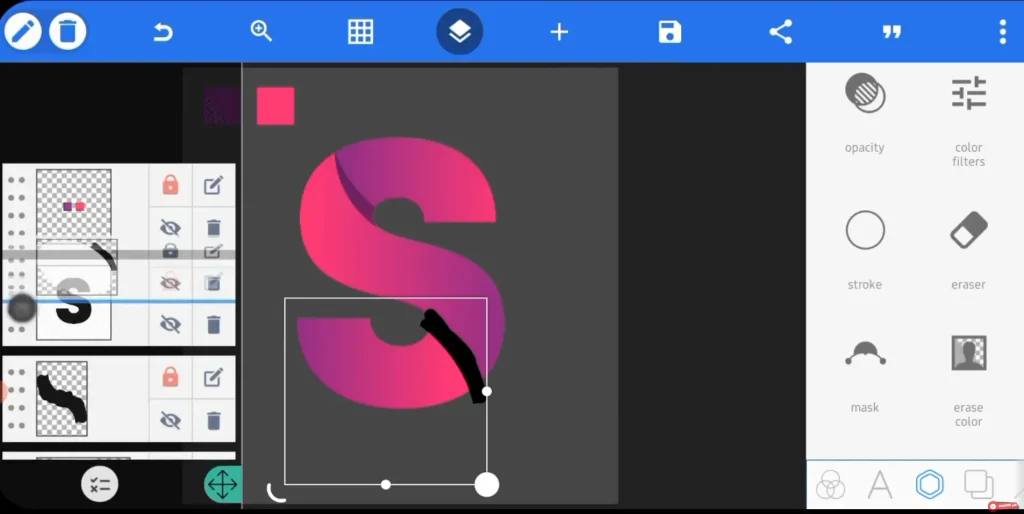
Step 20: Center the logo properly on the canvas using alignment tools.
Step 21: Review the logo at different sizes to ensure it remains clear and readable.
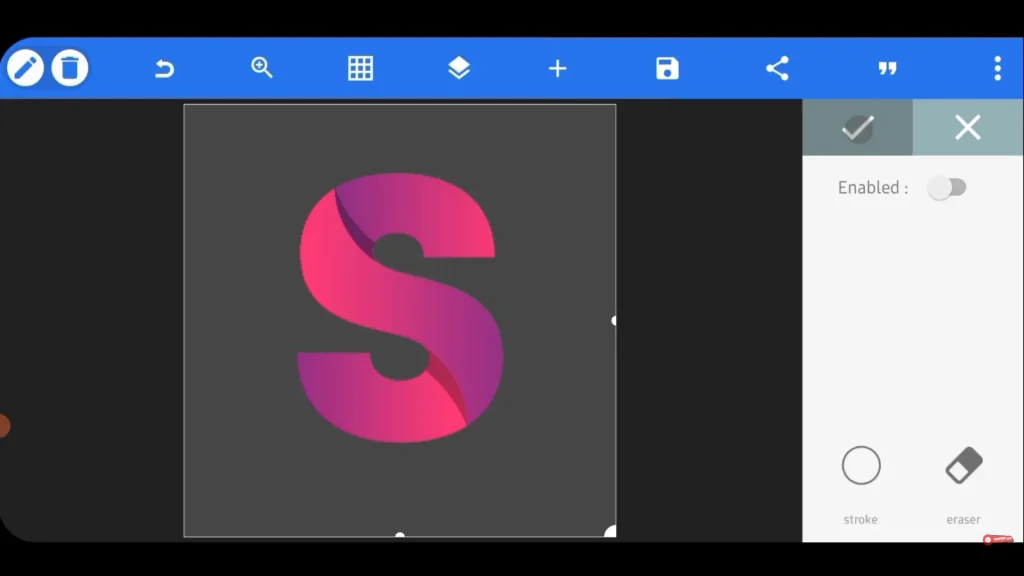
Step 22: Save the final logo in PNG format with a transparent background for professional use.
Step 23: Optionally, export an additional version with a white or black background for branding and preview purposes.
PixelLab Logo Design Guide
Designing a Logo from Scratch in PixelLab
Start with a blank canvas. Add bold text for the brand name. Use shapes like circles for icons. Apply 3D effects or gradients. Keep it simple; avoid clutter. Test on small screens for clarity. Layer elements for depth. Save drafts to tweak later.
Best Fonts and Styles for Logos
Choose clean fonts for logos. Try Montserrat for modern looks or Serif for classic vibes. Avoid overly fancy fonts; they’re hard to read. Use bold styles for impact. Add subtle shadows or outlines. Test fonts in black and white first. Keep sizes balanced.
Exporting High-Resolution Logo Files
Export logos in top quality. Choose PNG for transparency and sharpness. Set resolution to 300 DPI. Save multiple sizes: 512×512 for apps, 2000×2000 for prints. Name files clearly, like “BrandLogo_V1.” Share via Google Drive for clients. Back up originals.

