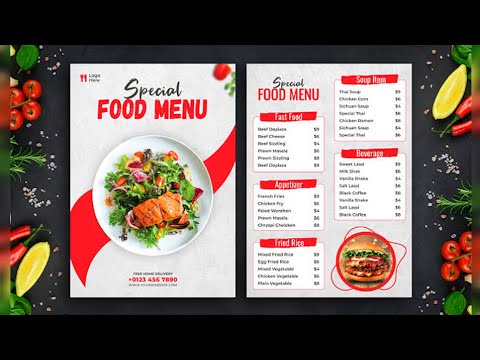
How to Create Stunning Food Menu Designs in PixelLab
In today’s competitive food business, a well-designed menu is more than a list of dishes, it is a powerful marketing tool. A visually appealing menu builds trust, highlights your brand, and influences customers’ purchasing decisions.
PixelLab, a popular mobile design app, allows anyone to create professional-looking food menus directly from their smartphone.
This guide walks you step-by-step through the entire process of creating stunning food menu designs using PixelLab, even if you are a beginner.
Why Use PixelLab for Food Menu Design?
PixelLab is ideal for menu design because it offers:
- Easy text editing and styling
- Custom fonts and color controls
- Shape and image overlays
- Background editing tools
- Export in high-resolution formats
- No need for a computer
Whether you’re designing for a restaurant, café, food truck, bakery, or home business, PixelLab gives you full creative control.
Planning Your Menu Design
Before opening PixelLab, define the purpose and style of your menu.
Key Questions to Answer
- Who is your target customer?
- What type of food do you offer?
- Is your brand casual, luxury, fun, or modern?
- Will the menu be printed or shared online?
Choose a Menu Style
- Minimalist
- Modern
- Vintage
- Luxury
- Fast-food
This will guide your color choice, font selection, and layout.
Setting Up Your Canvas in PixelLab
- Open PixelLab
- Tap “+” to create a new project
- Set canvas size:
- For print: 2480 × 3508 px (A4 size)
- For social media: 1080 × 1080 px
- Set background color (light cream, dark brown, black, etc.)
Creating the Menu Layout
A. Add a Header
Add your restaurant name:
- Tap Text → New Text
- Enter your brand name
- Use bold, stylish fonts
- Increase letter spacing for elegance
Add a tagline or slogan under the name.
B. Organize the Sections
Divide the menu into sections such as:
- Starters
- Main Course
- Beverages
- Desserts
- Combos
Use shapes or lines to separate sections:
- Go to Shape → Rectangle
- Adjust opacity for subtle separators
C. Insert Food Items & Prices
- Use clear readable fonts
- Highlight prices with smaller text size
- Align items neatly
- Maintain equal spacing
Pro Tip:
Use one font for headings and another for items to create contrast.
Using Images & Icons
Adding Food Images
- Tap Image → From Gallery
- Insert food photos
- Crop into circles or frames
- Reduce opacity for background decoration or keep full for highlights
Adding Icons
Add fork, spoon, fire, star icons for decoration and emphasis.
Applying Color & Visual Balance
Recommended Color Rules
- Choose 2–3 primary colors
- Use high contrast for readability
- Avoid too many bright colors
- Match colors with food theme (warm colors increase appetite)
Typography Tips
- Avoid fancy fonts for body text
- Use decorative fonts only for headings
- Keep consistent alignment
- Maintain visual hierarchy:
Restaurant Name → Section Titles → Items → Prices
Adding Branding Touches
Insert:
- Logo
- Contact number
- Address
- Social media icons
- QR code (for digital menu)
This adds professionalism and trust.
Final Adjustments
- Zoom in and check alignment
- Ensure spacing is balanced
- Check color contrast
- Proofread all text carefully
Exporting Your Menu
- Tap Save Image
- Select PNG for best quality
- Choose High Resolution
- Share directly or send for printing
Conclusion
With PixelLab, anyone can design restaurant-quality menus using only a smartphone. The key to stunning menu design lies in planning, layout balance, proper typography, appealing colors, and consistent branding. When these elements come together, your menu becomes a silent salesperson that attracts customers and increases sales.
Frequently Asked Questions (FAQs)
1. What is the best way to start a PixelLab food menu tutorial for beginners?
Getting started with a PixelLab food menu tutorial is simple for beginners. Begin by downloading the app from the Google Play Store (2025 version recommended), gathering free resources like HD food PNGs from Freepik or PNGTree, and setting up a canvas size such as 1080x1920px. This ensures your create food menu in PixelLab process yields professional results right from the preparation stage.
2. How can I add professional text effects in my PixelLab menu design?
To enhance your PixelLab menu design, professional text effects are added by selecting fonts like Bebas Neue or Monster Out, applying gradients (e.g., white to yellow), and using 3D duplicates with shadows and strokes. This PixelLab food menu tutorial tip improves readability and visual appeal, making your restaurant menu stand out on mobile or print.
3. Where to find free resources for creating food menus in PixelLab?
Free resources for creating food menus in PixelLab are easily sourced from sites like Freepik for food PNGs (burgers, pizzas), Adobe Stock for backgrounds (wood or marble textures), and font libraries for styles like Fatheya Food. Organizing these in a folder streamlines your PixelLab tutorial workflow, optimizing for SEO-friendly designs shared on Pinterest or blogs.
4. What export settings should I use for PixelLab food menu designs?
For optimal results in your PixelLab food menu designs, export as PNG with transparency and ultra quality for print or social media, or JPG under 5MB for web. Adjust sizes for platforms like Pinterest (square) to boost visibility. This create food menu in PixelLab step ensures high-quality, SEO-optimized outputs for restaurant promotions.
5. Can PixelLab be used for animated food menu designs?
Yes, PixelLab can be used for animated food menu designs by applying blending modes and parallax previews. Incorporate layers with imported PNGs and text effects for dynamic effects. This advanced PixelLab menu design technique, covered in many tutorials, helps create engaging content for digital displays or social sharing.